
Mo Cap, Unity, and Me – A Study in Low-Budget Motion Capture
by Andrew Polino
- March 9
- in
Every good story needs characters.
No matter what medium you're using to tell a story, people latch on to anyone they can relate to or feel for. And if that story happens to be in virtual reality, they can latch on all the more tightly. They share a space with the character. They inhabit its world. They empathize with it, no matter how obviously CGI it is. Case and point:
Notice the way these people move. It's never stiff or robotic. They gesture fluidly to each other. They naturally shift their weight as they stand still, each character has their own unique style of physicality, and their movements reflect their emotional state. To achieve something like this in Unity, you need the freedom to make any character you can generate do whatever you want it to do. And if you're like me, a relative beginner with a low budget, you don't have an animation team, so you go for the next best thing: Motion Capture
In a Nutshell
If you decide to animate a Unity character with motion capture, you'll have three steps:
- Record the movement - Your Kinect will act as a "skeleton camera" recording your body as a 20-25 jointed stick figure. Every time you start and stop recording, you have a full file of raw motion capture data.
- Clean it up - Even premium quality motion-capture requires a little bit of fixing and editing. And this is budget mo-cap, so chances are you'll have a lot of jittery movement, limbs going through torsos, a lot of visual problems caused by flaws in recording. So you'll need to smooth out the animation frame by frame. You can do this with 3D animation software (The most popular is Maya. I use Blender because it's free (and even has a "Maya" layout setting).
- Attach the finished animation(s) to your character(s) in Unity - Once you've made absolutely sure your characters and animations are properly rigged, you build an Animator Controller for your character and sequence together animations for it using Mecanim.
Getting Started: Know Your Limitations
The good news is, motion capture technology has reached a point where anyone can do it. You don't need the traditional blue-screen suit with white ping-pong-ball markers and a state of the art mo-cap studio to choreograph and record your own motion capture movements. I've done all of mine so far with the following:
- Unity 5: Personal Edition (free)
- A single Xbox Kinect 2 ($65-$90 on average)
- A good tripod (another $65-$90 on average)
- Blender (a free downloadable 3D Graphics/animation program)
- Cinema Mocap: a Unity plugin that allows you to record mo-cap data directly through Unity ($60 at asset store)
So that's about $200 total for a one-person motion capture studio. BUT...
Before you shell out any money, it's vitally important to know that every bit of motion-capture software has limitations. You get what you pay for. I paid $60 for Cinema Mocap. And while it's very user-friendly and easy to use, there are a number of caveats:
1.) It can only record one person at a time (so I can't record a scene where two characters interact. Instead I have to record each character's movement separately and sync them to the same soundtrack)
2.) It currently only supports one Kinect device at a time (this places HUGE limitations on the kinds of movements it can capture. With only one camera at a time, Cinema Mocap can only see my body from one angle. So I can't turn around, cross my arms or legs, or basically do any really nuanced or elaborate movements)
3.) It does not record spacial movement. Since Kinect and the Cinema Mocap plugin have very limited ranges, I'm basically acting while trapped in a box. A lot of times, when I around within the space, it doesn't translate (i.e. if I walk forward or backward, the mo-cap recording will mostly be the skeleton seeming to walk in place). So I need to animate spacial movement in post-production.
The lesson here is simple: Before you dive for the cheapest or most popular piece of a motion capture software, do your research, and know what you're buying (There are a lot of pieces of mo-cap software out there right now. I'd suggest comparison shopping)
Getting Set Up:
Now let's take a quick look at our budget mo-cap studio in action. Let's say I'm working on a V.R. piece on eye-witnessing police violence (which I am, by the way). And I want to start the scene by having a police officer yelling at a pedestrian to 'stop' (which I absolutely do).
First, I build myself a 'police officer' character using Fuse and auto-rig it via Mixamo. I highly recommend this for anyone using human characters in their project. You can use it for free, you can import 3D characters and objects into it, and you can fine-tune absolutely any bodily or facial feature. Though I highly recommend having a photograph to go by when adjusting your character.
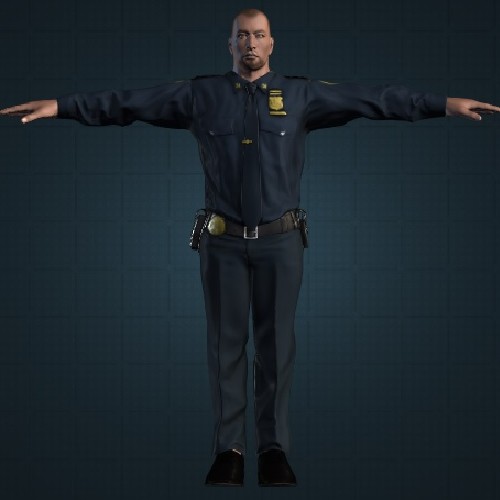
You'd be surprised how easily it is to make these things look like aliens.
Now I plug in my Kinect and hook it up to my laptop computer
(*WARNING: For some reason, the Kinect driver used to cause my laptop to freeze a few minutes after booting up. I've been able to prevent this by opening the Task Manager after booting up and making sure the "KinectMonitor" service is turned off
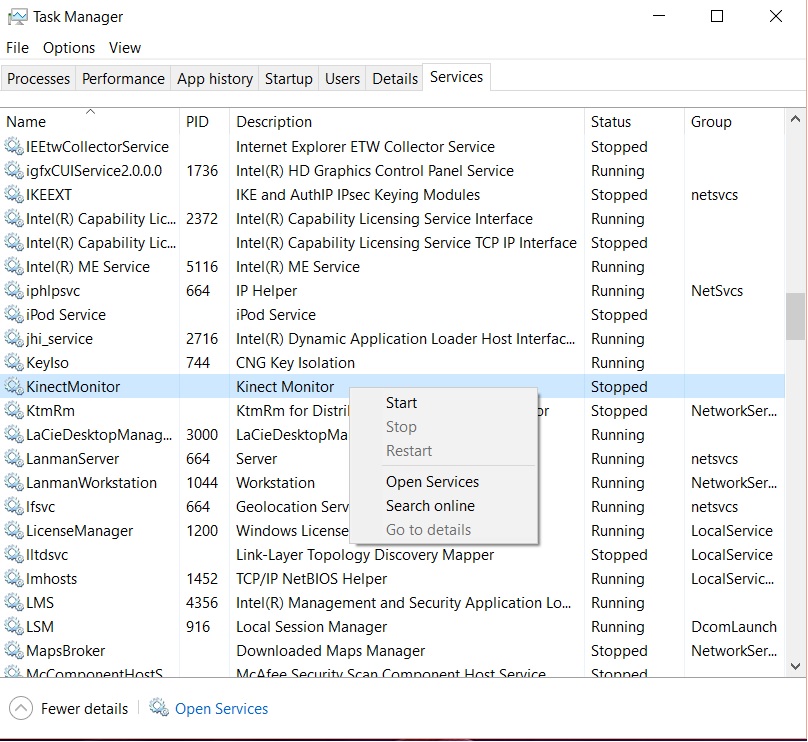
Like so...
Of course, KinectMonitor does need to be running when you're about to record your mocap data or else Kinect won't turn on. So I have to go back to Task Manager and 'Start' the service up again before opening Unity)
Then I make sure Kinect is properly mounted.
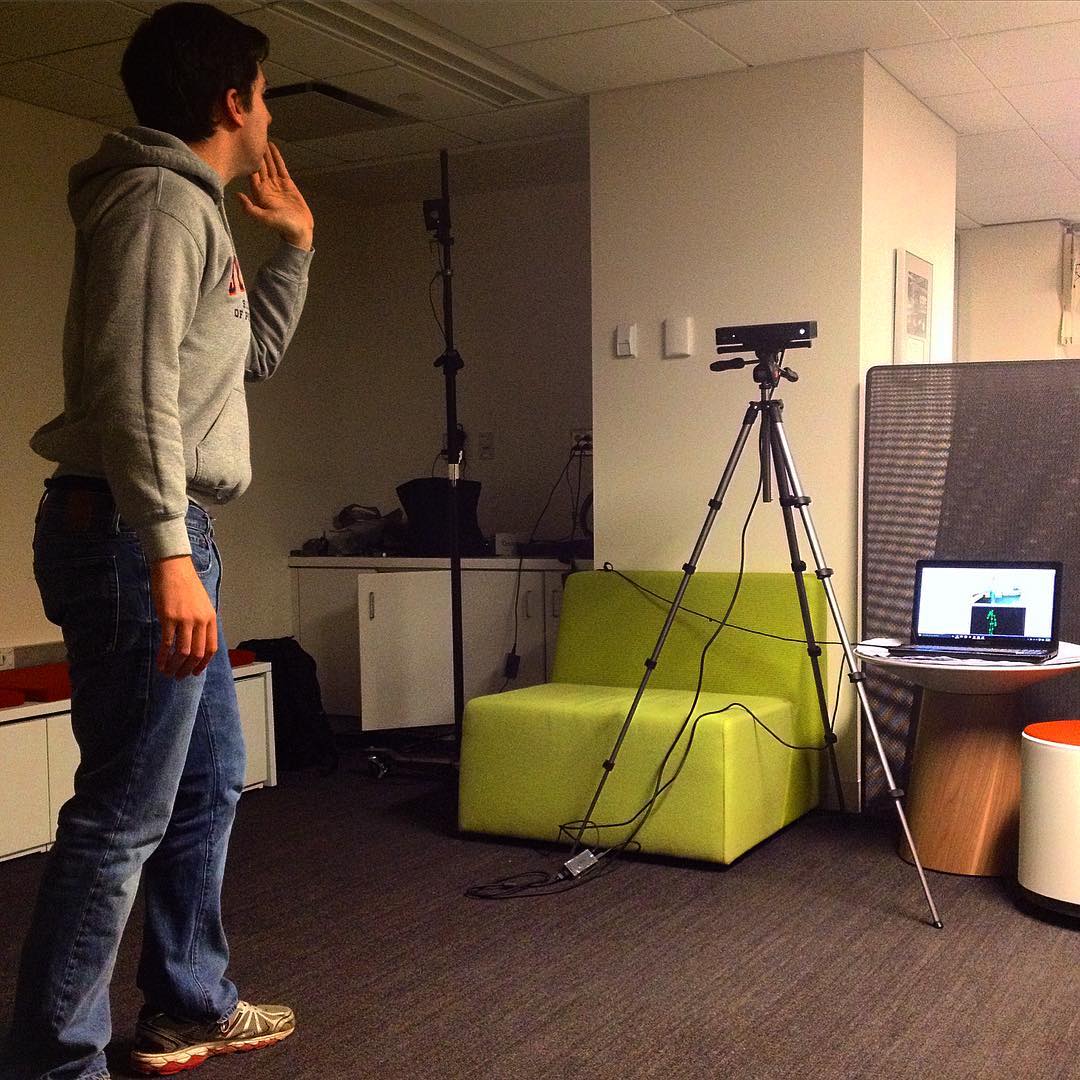
Taking time to figure out where Kinect gets the fullest view of me in action.
Now I open up my mo-cap software (in this case, Cinema Mocap, which I access by opening my Unity project, clicking 'Window' and choosing 'Cinema Suite' > 'Cinema Mocap') and make sure it's ready to record:
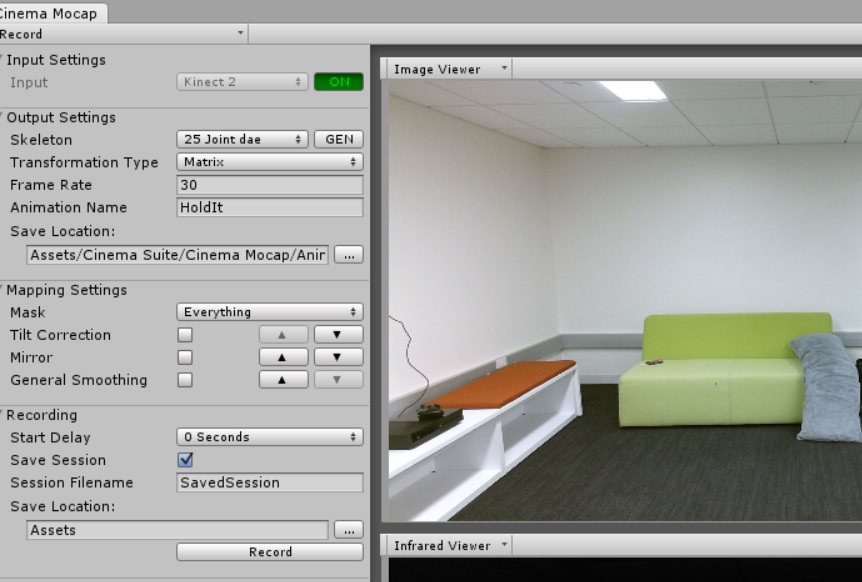
These are the basic settings:
Input: Kinect 2 (the model I'm using. CM is also Kinect 1 compatible). And press the 'On/Off' button next to Input when the Kinect is plugged in and ready. You'll know it's ready when the Image Viewer turns on.
Transformation Type: Matrix (*IMPORTANT* You need this setting to import the data to Maya or Blender to clean up later)Frame Rate: 30
Animation Name: *preferably something easy to remember to help organize your takes and movements*
Save Location: A place you can easily find it in your project's Assets folder (CM's folder in 'Assets' includes an 'Animations' subfolder. This is the best bet)
Start Delay: *up to 10 seconds*. I like to give myself time to get into position.
Alright, looking good. Let's do a take!
Recording the Movement
If you can ignore my commanding physical presence and Oscar-worthy acting for a second, take a look at the green dots on the screen. Each one of those represents a skeletal joint that Kinect is closely tracking and monitoring movement.
Notice that a couple of the dots turn red at certain points. Whenever that happens, that part of the body has hit a 'blind spot' for the mocap recorder. This can happen if you turn away or block that part of your body from the lens's view. Cinema Mocap will do some guesswork to fill in the blank.
Now I've hit 'Stop'. Take one is in the can (namely Assets > Cinema Suite > Cinema Mocap > Animations). Let's see how it looks:
It looks like our officer on duty suffers from acute chronic jazz hands.
Jittery joints are the most common problem with motion capture. Before we apply this motion to the character, we have to clean the animation up.
Cleaning it Up
This is where we get rid of the shakes, posture problems, and excess seconds of recorded material and export it as a piece of ready-for-prime-time mocap animation.
For this part of the process, there's nothing I can say that this tutorial can't say better:
Cinema Mo Cap - Tutorial: Editing With Blender (note they also have a tutorial for Maya. Again, Blender's free)
I will add though that this is the trickiest, most frustrating, time-consuming part of motion capture, and it takes practice. So make sure you familiarize yourself with whatever 3D Animation software you're using.
Attaching Animations To Your Character
After you've finished cleaning up your data, exporting your new animation file, and importing it to your Unity project, it's time to assign it to your character.
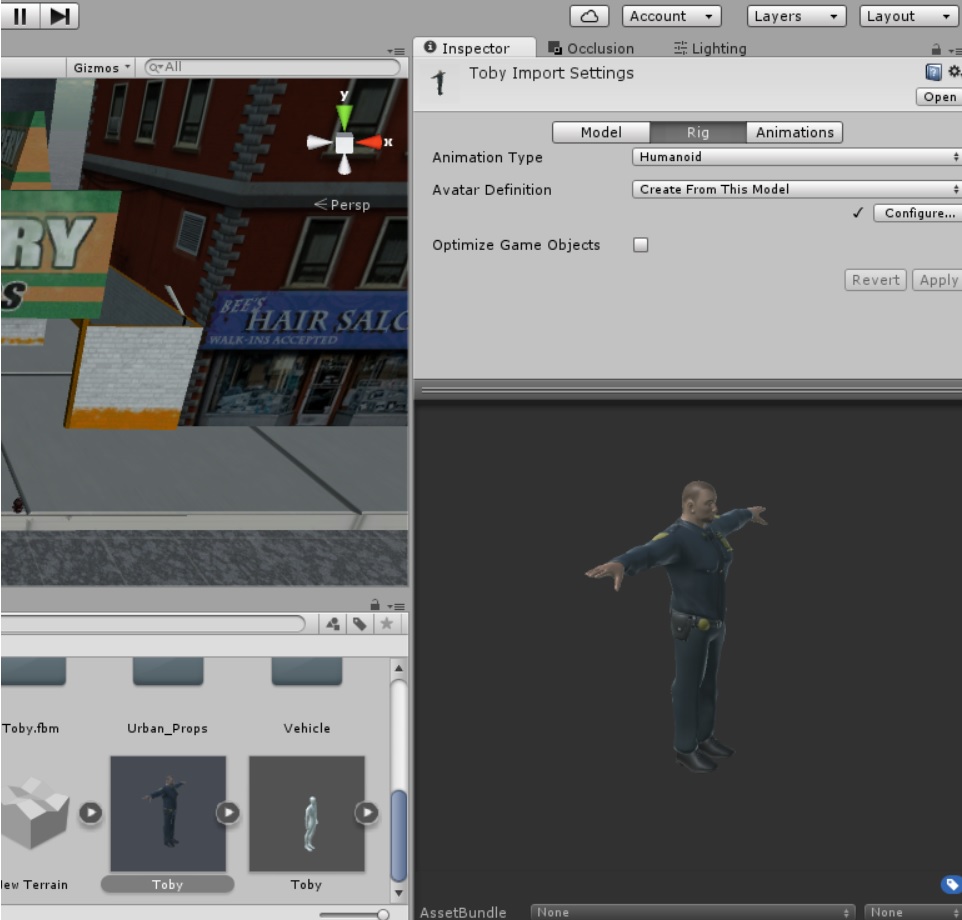
First, I want to make sure that both my character file (in this case, the left "Toby" with the uniform) and the animation file I've finished (the right "Toby" with the neutral white skin) are both rigged properly. The animation type for both should be set to "Humanoid" and the Avatar definition for both should be "Create From This Model".
Second, I create a new Animator controller for Toby so I can assign him different sequences of animation. On the Unity toolbar, go to Assets > Create > Animator Controller
Give your controller an easy name to remember (I've named mine "HoldIt") and double click
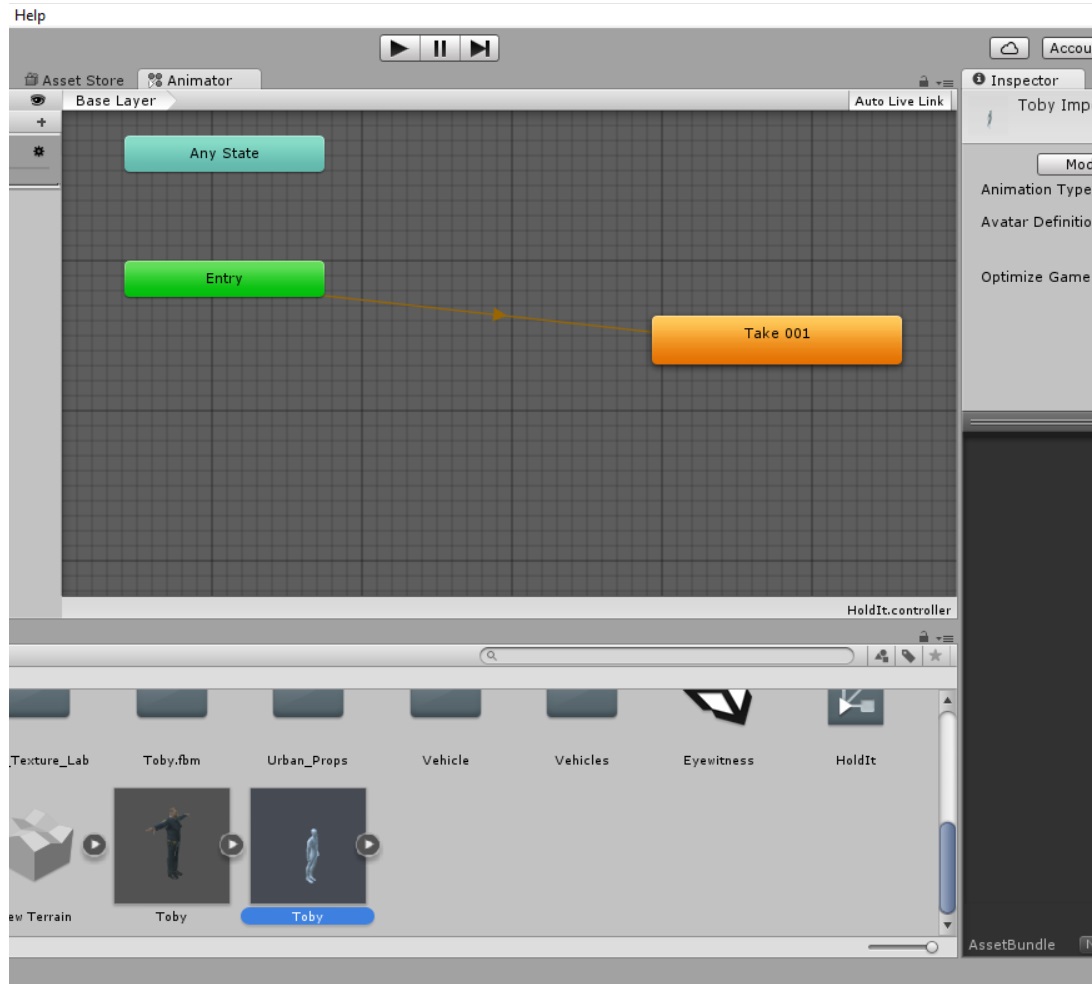
Top: Your standard Animator Controller
Bottom (highlighted): The file you want to drag into it.
You can drag your animation file from the folder, directly into the animation controller, and Unity will automatically set it to play the moment your game starts (the green 'Entry' button refers to the start of the game). If you want to program a sequence of animations into your character, you can drag in more files and connect them with transitions.
And now all that's left is to assign this controller to your character.
Drag your character into the scene, highlight in your project Hierarchy, and on the Inspector, look for the "Animator" component (if it's not already there, use the "Add Component" button to attach it), and set the "Controller" to the one you've just made.
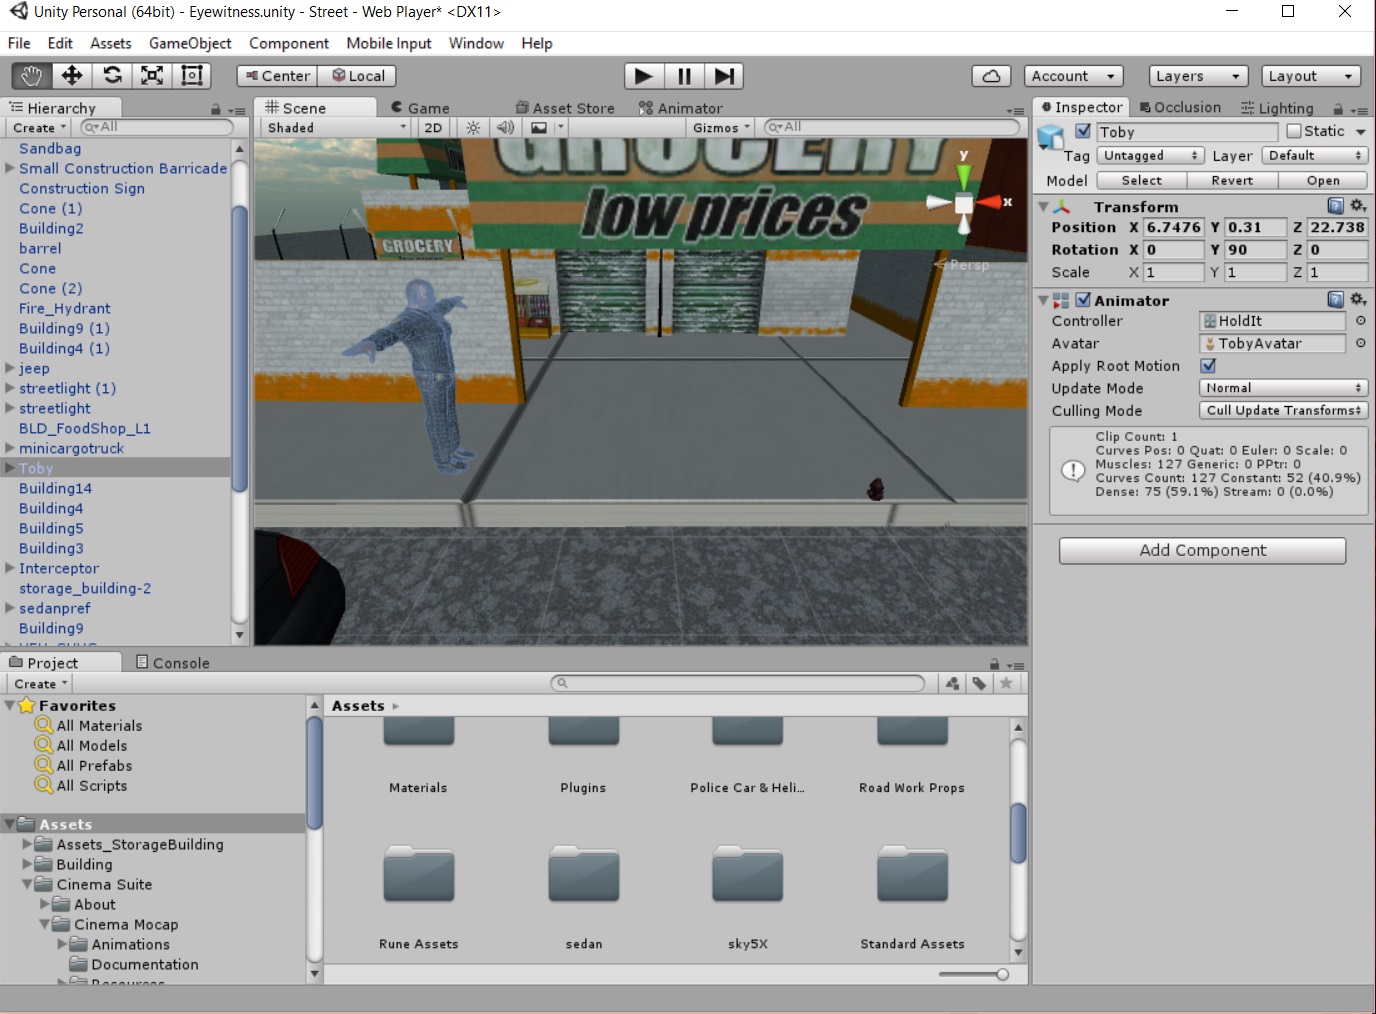
Like so...
And that should do it! Let's see how it all turned out:
And there it is! Low-Budget Motion Capture 101. There's still plenty left to do of course. We still need to create more movements, animate his hands and fingers, attach props and items, and synchronize his movements to a soundtrack. As far as mo-cap goes, we're just getting started.
But if you're determined to use VR to tell your own stories with your own characters, you've just opened up all kinds of possibilities of things you can get your characters to do.
As a certain iconic figure once said, "You've taken your first step into a larger world."

COMMENTS