
Final Project Articek: Downtown Syracuse
by Claudia Articek
- December 13
- in
Start: How I found my topic.
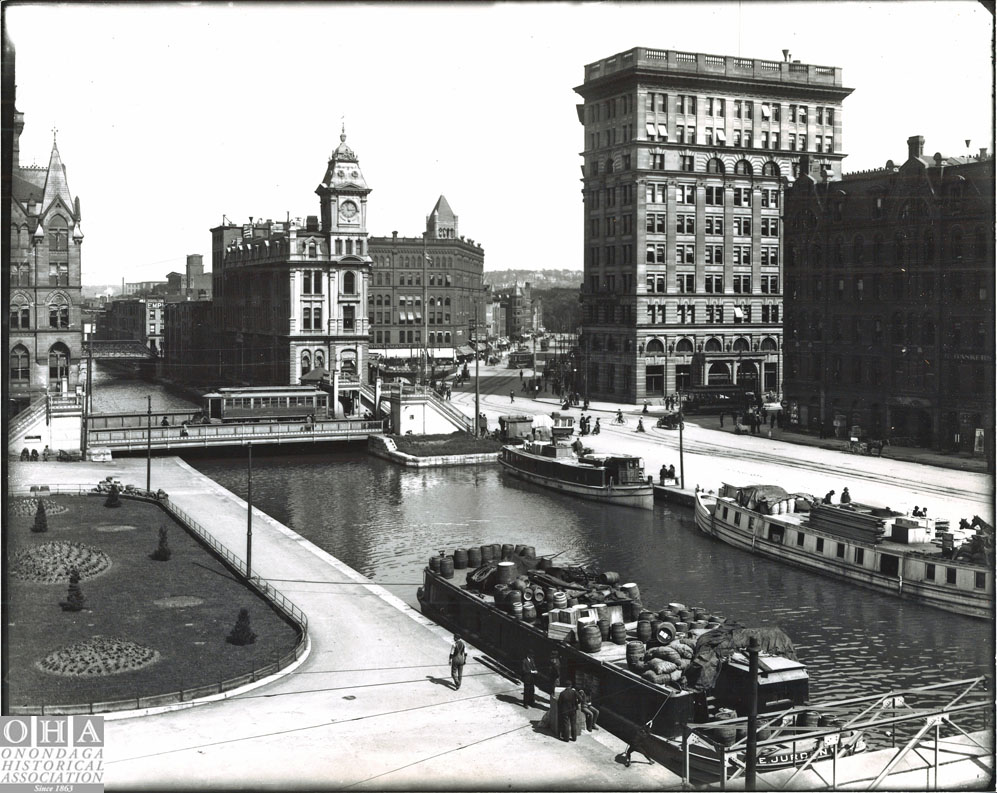
It was a long way until I got the topic of my final project. Ambitious as I am, I started to work on the topic in the middle of the semester. I really wanted to show the user the incredible facility of the Landmark Theater in Syracuse. Unfortunately, the Landmark Theater couldn’t see the emerging technology of a virtual reality video and didn’t give me permission to shoot as well as to talk to me. “This is nothing for us”’ they said. Okay, I accepted it and head to new shores: A 360 video about Syracuse’s orchestra Symphor!a. I had a connection to the manager of the orchestra and we talked about it. The opportunities of promoting with a 360-video amazed her. She just needed to get the final approval from all the board members. She couldn’t. “The time is too short”, she said. She was right, I just had two weeks to shoot the video. I also did my elevator pitch about Symphor!a and got constructive feedback from my fellow students of VR Storytelling. Unfortunately, I needed to change topics again. Thanks to Prof. Pacheco, he spotlighted the Onondaga Historical Association (OHA) and mentioned, that a tour through Syracuse Downtown would be great. I agreed with him. After a conversation with Gregg Tripoli, manager of the OHA, about my project, he declined also. “I don’t feel comfortable doing this”’ he said. Whatever this may mean. So, off to plan D. This time, I didn’t want to be dependent on anybody because it didn’t go well the three times before. Meanwhile, it was Thanksgiving break. That meant two more weeks until the project needed to be shot, stitched, and edited. I did a research about places I want to shoot and what these places could tell the user. Because storytelling was a major factor in this class and I am a soon to be PR professional, I wanted to do an informative video which shows beautiful places in Syracuse and could help increasing the positive image of Syracuse for a visitor perspective. That is also the main target group of my video: Tourists and visitors as well as new students. When I was applying for Syracuse, I searched for photos of the town in the web and the ones I saw weren’t that convincing. Thus, I thought it could be nice to promote Syracuse with a new technology video for their own experience. I also wanted to include historical information. But later more.
Shooting: Off to Downtown Syracuse
After the topic was defined, I went on the most promising day regarding the weather to Downtown Syracuse with the new GoPro 360 Omni rig. One week left to shoot the project, I didn’t have more time to wait for a day with better weather than this one. It wasn’t rainy but it wasn’t sunny either. So, I just went with the weather.
Before I started shooting, I tested each camera and charged the battery (very important) for one hour. Even though the display showed full battery, during the shooting the battery went off and I needed to go to a Café to charge it again. Note: Charge the battery at least two hours before you are going out! But it wasn’t so bad, because I could have a look on my first footage and if everything is working. It was. And I was very glad.
Stitching: The moment of walking around campus
I went to four other locations in downtown Syracuse and shot my video. After 6 hours, I was back at Newhouse and ready to stich. I went to the lab 206A NH1 and noticed, that I didn’t bring my card reader. Note: The editor suite at the fourth floor in Newhouse 2 has card readers! Back in the lab, I started Autopano Video and noticed that on all of the three computers which always had the premium account, there was only the free trial version of Autopano installed. I couldn’t work with that because as soon as you render your video, the trial version automatically adds its logos all over your video. Ugly and not professional to use it for my final project. So, I packed everything and went to the Innovation Lab. Saw a micro card reader, was angry about myself but inhaled and exhaled deeply and continued. I had the feeling on this day, everything went wrong. The rendering took ages. I had six different videos which needed to be rendered in the uncompressed export to edit it in Adobe Premiere Pro, too. Note: Take your time, it will last longer than expected!
Editing: New fields need time to discover
After stitching and blending and rendering the videos, I took me one day to add the nadir spot, the photos and to fade audio and video in and out. One day because I haven’t used Adobe Premiere in a long time and was not on a professional level at all. I needed to watch many tutorials and read the manual we got in class. I am still not satisfied with the audios of my video but I couldn’t figure out how to remove the wind while keeping the original noises and don’t transform them into robot-like noises. Which tutorials I used and which I recommend can be seen here. Note: If you use a higher Version of Adobe on your own computer, you cannot open it on the computers in the labs or the innovation lab. I needed to go through this experience, too.
VIAR360: Telling a story
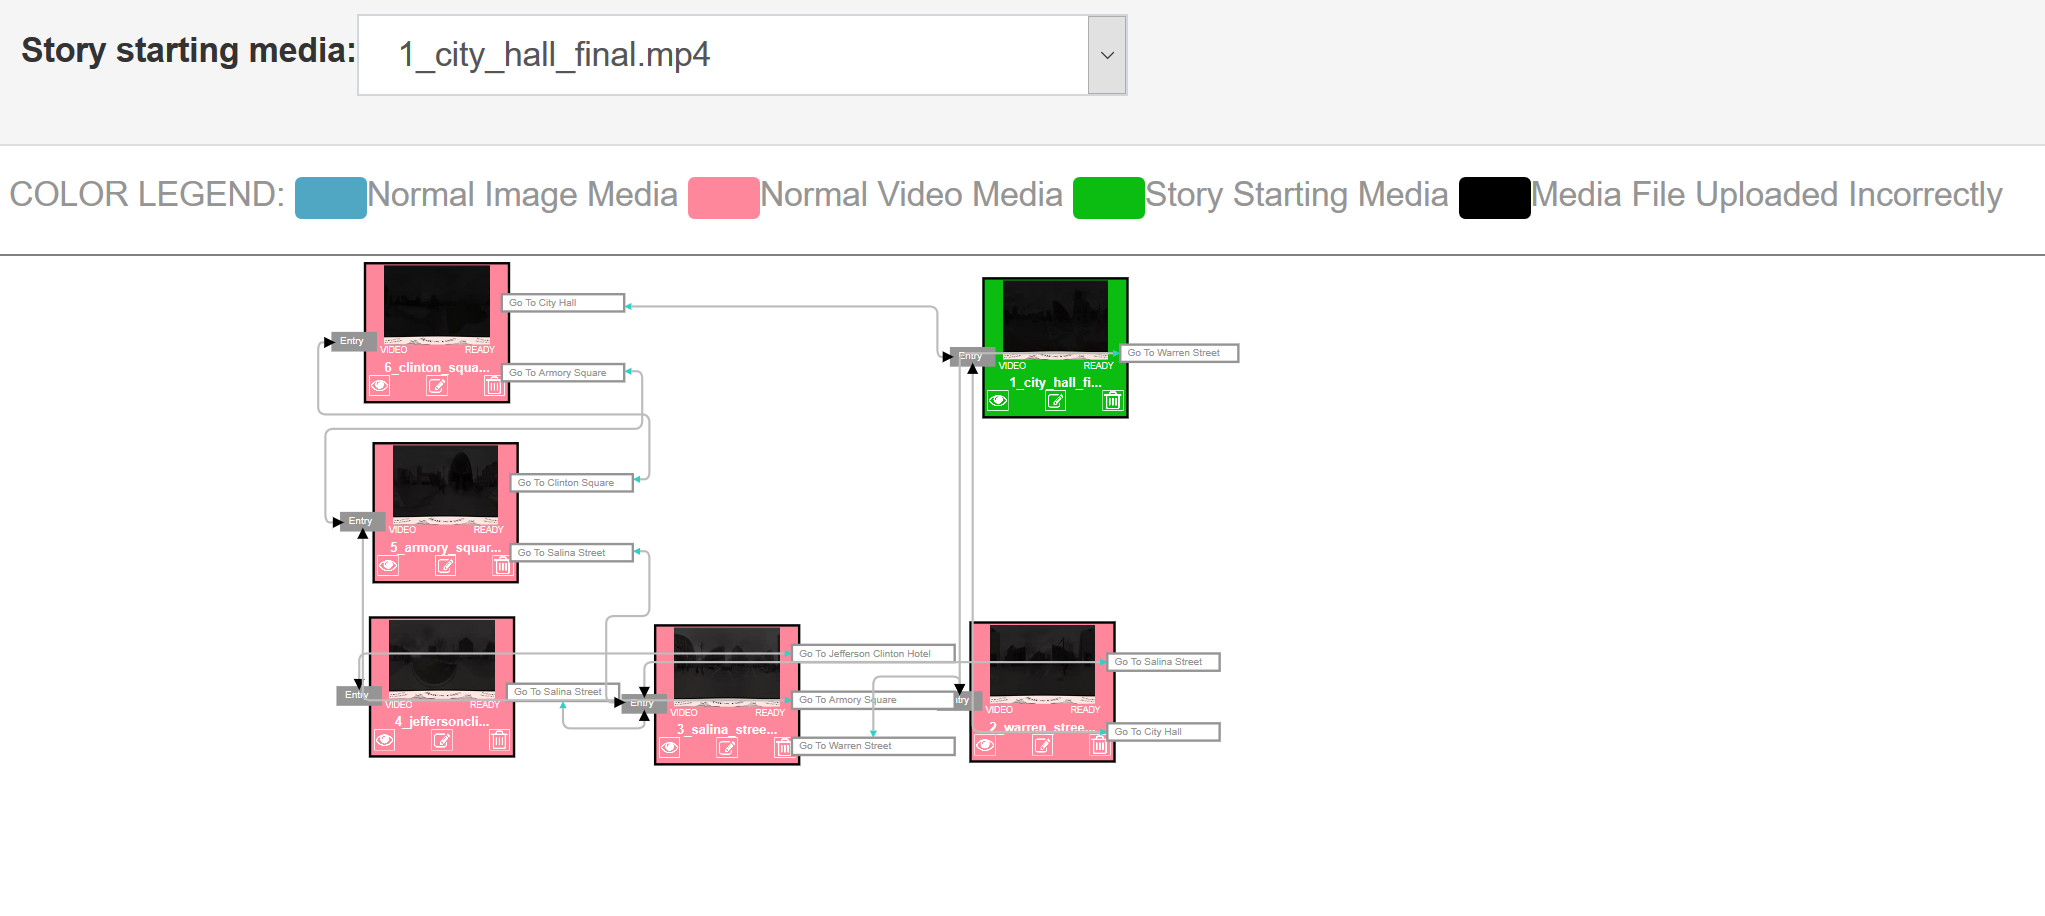
With six videos, it is very nice to add transition to them and provide the user the experience to walk through the videos instead of having one long video. That is why I decided to edit my story in viar360. I had the possibility to add transitions and additional information. I also wanted to insert the photos from the OHA there, which are showing the buildings how they used to look like. But unfortunately, I figured out that the images inserted in viar360 are 360 images as well. Note: If you add a 2D picture in viar360 it will show as a panorama picture. So, back to Premiere, edit the video again and render it again. Puh.
But still, Viar360 is a provides a good platform to tell a story over different videos.
This is how my projcet looks in VIAR360:
Finalizing: Again, long rendering
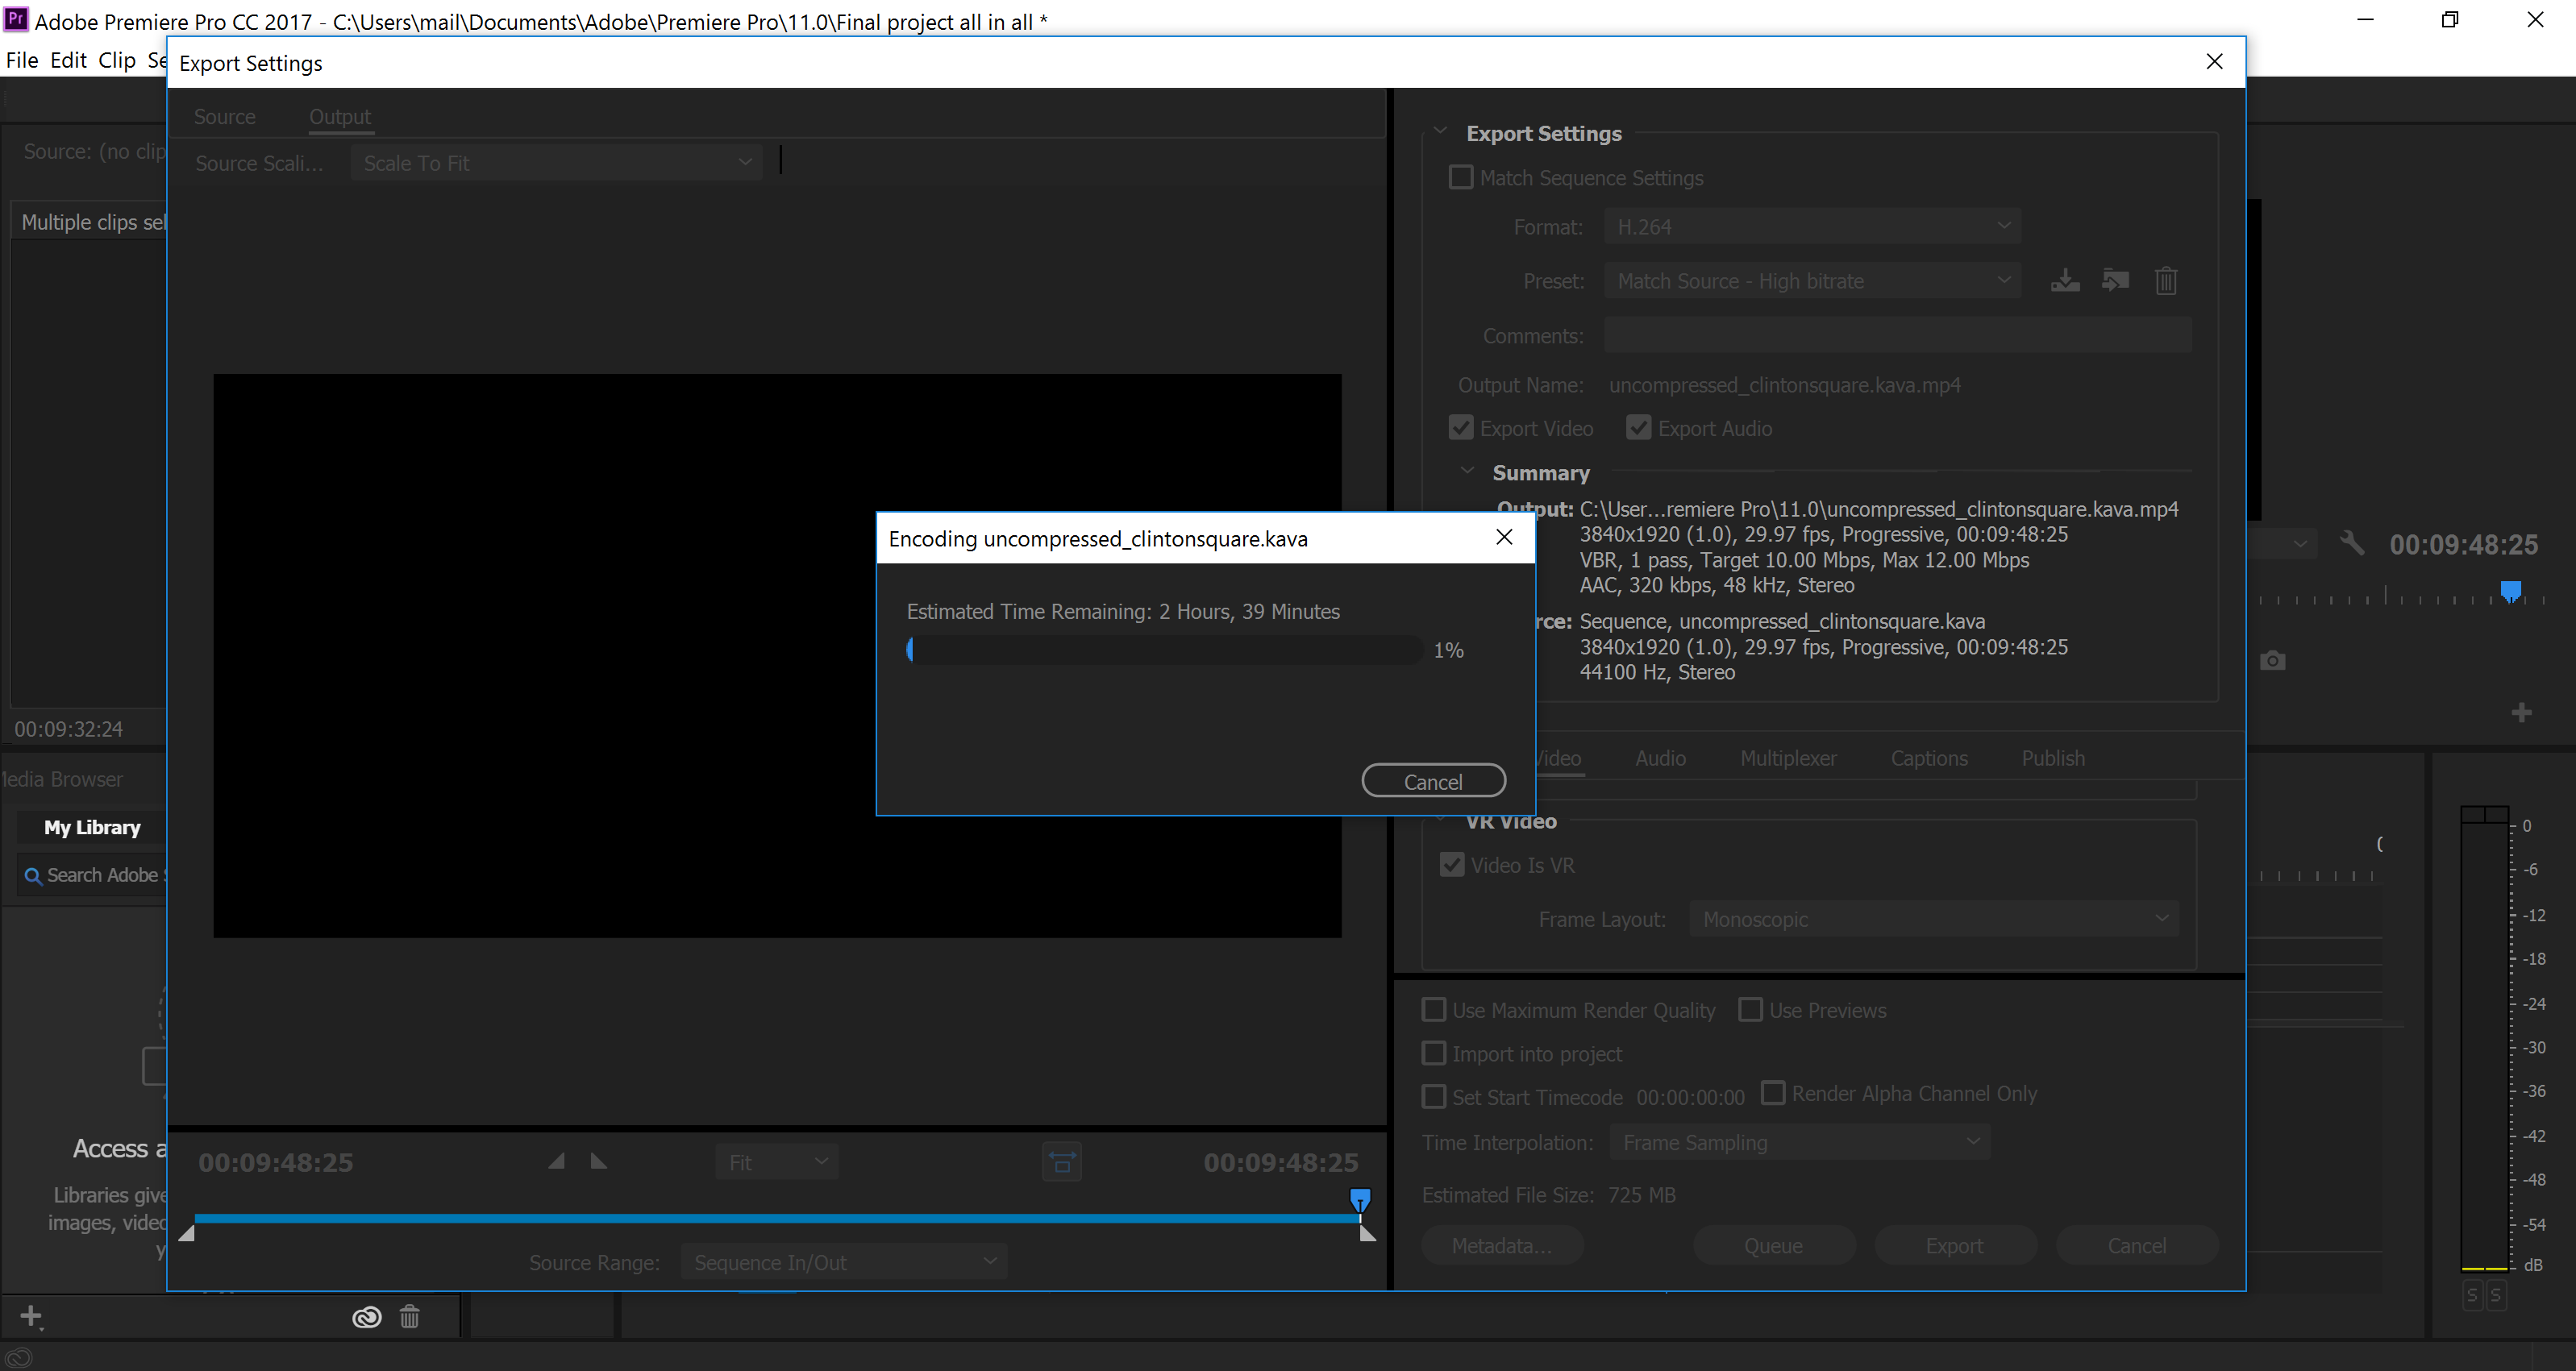
Six videos combined in one which equal about 10 min last very long to render. I am repeating it over and over again because I have underestimated the time it needed and you shouldn’t! Just to give you a quick proof, here is a screenshot from the rendering:
Keep it in mind!
Creating the trailer: First time
Of course, I saw a lot of blockbuster trailer or similar ones. But I never did one on my own. I was even more excited to create my first trailer. I didn’t know what I should include or how to develop it, but I tried. It is probably not the sexiest one and it won’t win an Oscar, but it shows my 360-video and what the user can experience there.
In conclusion: Lessons Learned
So, what I will give you as an advice are the following points.
- Listen in class – it makes it a lot easier at the end
- Take your time – with everything you do
- Calculate a buffer – it will take longer than you expect
- Don’t give up – there is always an interesting topic which can be shot in 360
- Learn for you – it is not to get good grades; this class is to learn a new technology and be ahead of your competitive applicants at new companies
Links

COMMENTS