
New Skill Blog- Photogrammetry

Photogrammetry Tips
Photogrammetry is simpler than you might think but it is a long and tedious process with lots of bugs in it. The basic premise is to take photos at every angle of the object you want (with about 60% overlap of coverage in the photos) and then plop them into a program like Autodesk ReMake which stitches it together for you.
Turntable/Lazy Susan method
THIS DOES NOT WORK! DON’T WASTE YOUR TIME!!!!!
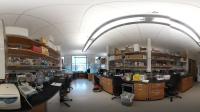
I read a lot about this on the Internet when researching photogrammetry and many people suggested this method but I had no luck with it at all. Rotating myself around the object worked much much better. One of the reasons for moving around the object is because the background is so important to the construction of the object. The rest of the room helps the computer understand what goes where and often times I have found that the busier the surrounding the better the quality of the 3D objects. When you do the lazy Susan method AutoDesk Remake has a lot of trouble making sense of what is happening even if you put something like a newspaper, which many suggested around it.
The best objects I ended up with came out when I was on a hard wood floor. I think the lines helped the computer understand where the photos were supposed to connect.
Lighting
This is by far one of the most important elements of getting a model to work. If the lighting is off or too dark ReMake wont even try to create the model. This is honestly for the best though because it takes about an hour or so for model to generate and when Remake can’t do it takes two minutes and you know right away without having to wait which is nice. The lighting also should be as even as possible so there aren’t shadows and so ReMake can read the images better.
F/stop
It is important to have as much in focus as possible, so the F/stop needs to be as high as possible. Also try to delete any out of focus or blurry objects before generating your model, you will see the blur in the model or it might cause it to not come out at all.
Focal length
You need to be at a fixed focal length.
Avoid
-Shiny/reflective objects (or avoid the reflection in the objects i.e. I took photos of picture frames but I adjusted slightly to still get all the angles but to not take any photos with light reflected off the frames)
-See through objects i.e. glass anything
-Plain/un-textured objects- when a surface is too plain it does not have enough information for the computer to process (this is the same reason as why having a busy background is helpful)
Don’t fix - Re-shoot
The quality of the photos is what I have found to be most important. It is not worth the time and effort to fix a model in the computer and it is easier to just go back and take a new set of better photographs. Small details and quick fixes are fine but when you need to do more just redo it.
I experimented with photogrammetry for my final project, making 3D objects from inside a museum.

COMMENTS